|
Spring 2001! |
|
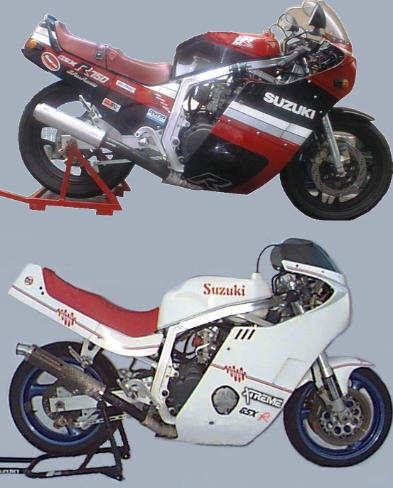
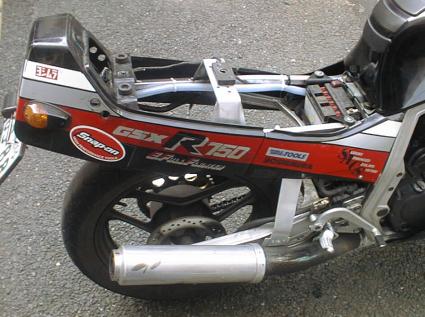
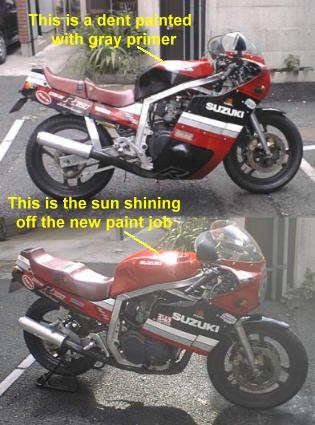
Someone posted this great pic of an early Gixxer highly modified, I put it
in as a reference to my old Gixxer, basically stock on the top. I am
trying for something like the bottom pic. Way cool bike.
|
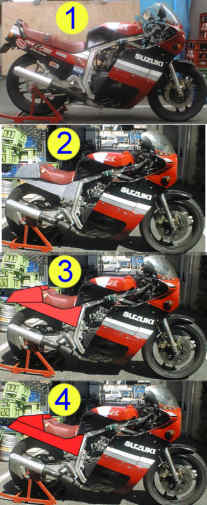
Top pic is stock, the next three are variations on a theme of cutting the
side panels down, and losing some rear end bulk. I think the end result
will be closest to #4
|
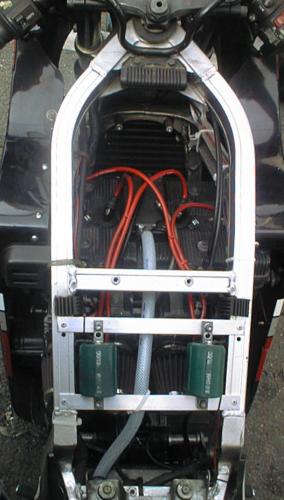
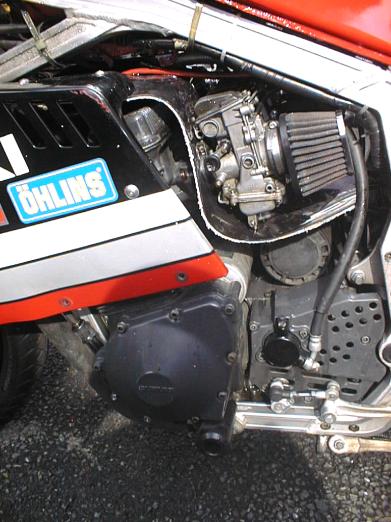
When I took the air box out and put the K&N individual filters on, I
freed up a lot of space under the tank. Then when I got the Dyna coils to
replace the dead stock coils, the Dyna coils would not fit in the stock
coil mounting position, so I used the open space under the tank. You can
also see the crankcase breather hose I put in. Without the air box, the
short breather hose puts all of that lovely blow-by right in the center of
your bike, stinks in traffic! The hose goes all the way to just behind the
license plate. |
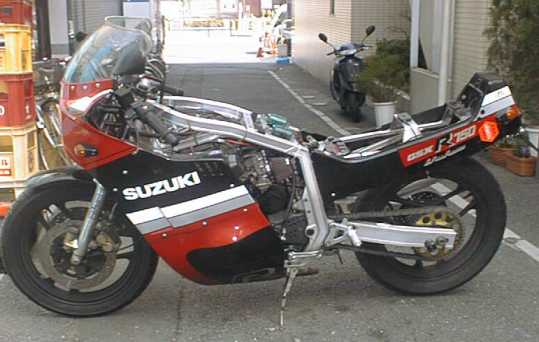
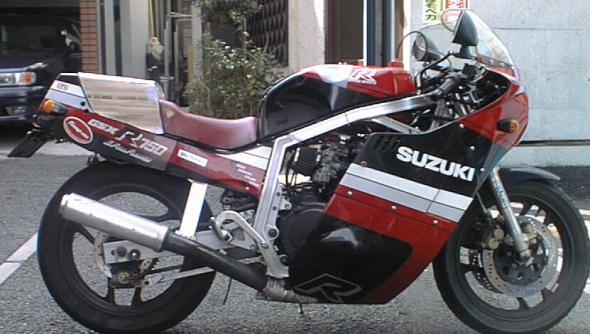
Here is a pic of the left-side of the bike, if you take a look at the
stock pic, you can see that the area under the seat just above the
swing-arm is much more open now. This should cure some of the overheating
that this bike experiences in the rear shock area. From this side you can
also see that I got rid of the chain guard. Not carrying passengers kind of
eliminates the need for it. I will make a small guard near the front
foot-peg, just to be safe. |
A much closer view of the cleaned up rear end. You can also see the new
pipe hanger that I made as I got rid of the rear seat foot pegs etc. |
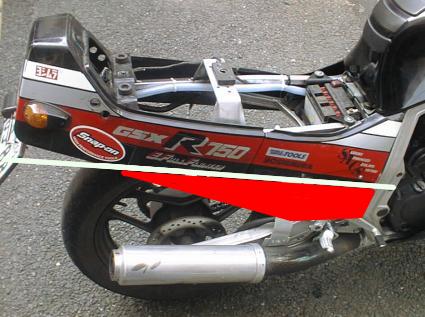
Kind of a before and after picture, the white line is where I cut the body
work. The red area is where the old body work used to go to. |
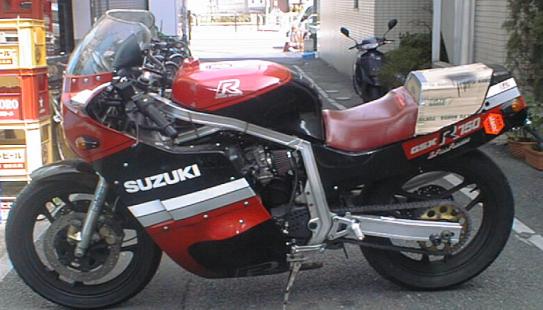
Left and right side shots, the single seat cowl is just cardboard at the
moment, I will make one when I have time. I think that this is just a
slight update of the style of the bike, in fact, unless you had a completely
stock Gixxer parked right next to it, I don't think most people would
notice, that is part of my goal. I have been able to spend a few enjoyable
evenings out in my Gixxer garage, as I do not have the time to ride at the
moment, and I have not spent much if any money (after all the beer is
free!) |
|
March 21st 2001
Well as I have been fooling around with the Gixxer here
for a few days, I finally decided that it really needed a good wash, so I
started to clean it up. The rims are really dirty, so I was scrubbing them
when I heard a hissing sound, the rear tire valve was cracked and leaking!
I had planned on putting new rubber on the bike in April, as things are a
bit tight, but with the valve cracked and leaking, it looks like I'll have
to do it this month.
I have decided to go with the Bridgestone BT020 110/80 upfront, 160/60 in
the back. I wanted the Metzlers, or the Avon tires, but the guy I go to
for tires don't think they're so great for the old Gixxer. I ran Metzlers
on the 86 in 86, and I wore them out in 3 months, I know that the tires
form 15 years ago are not the same as now, but what the heck I've never
run Bridgestone's before.
Next step will be the Ohlins shock, that is if it ever
gets here, and I will be taking the forks apart at least just to change
the oil that has NEVER been changed! I will most likely also put some kind
of new "Progressive" springs in there, and I might take the leap
and put new seals in too, we'll see.
More Pics later. |
|

I know that Gixxers are supposed to have a flatspot in the power curve,
but not a valley! the chart on the right is from Kenso corp., that is the
best they could do, and then they gave up and asked me to PAY and leave
please! the chart on the left is from Dr. Suda, much, much smoother
delivery of power. The top HP for the Kenso chart is higher, but the
valley in the power curve is so bad that you could not pull away from stop
lights. Suda may not have as much power on the top end, but the bike is a
pleasure to ride.
|
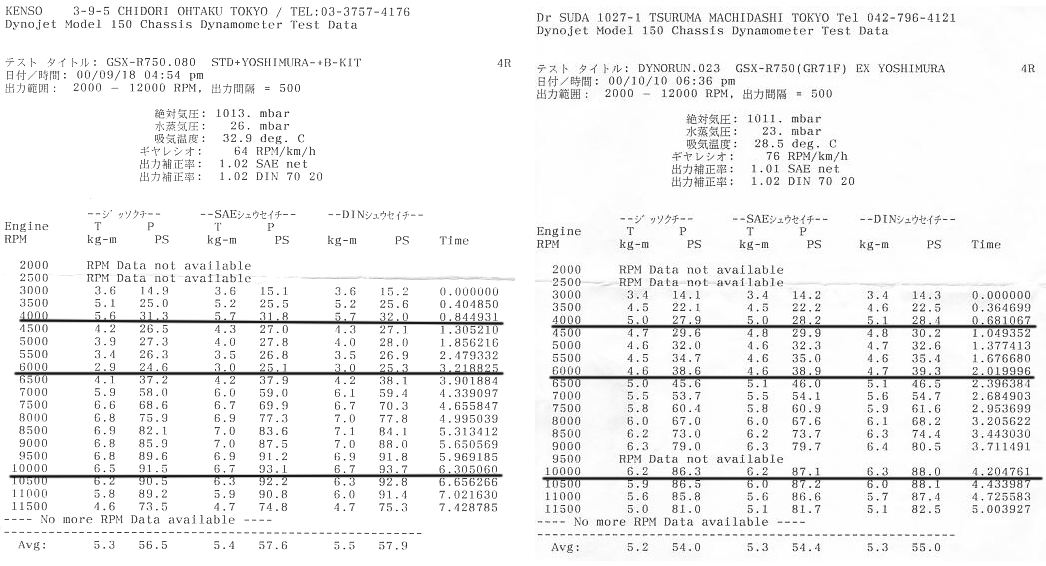
Here are the numbers from the Dyno testing. The Dyno on the right is from
Kenso Corp. they did a piss poor job, and charged me way too much! Look at
the drop in HP form 4000 rpm to 4500 rpm, The bike ran so poorly it was
not rideable. I then took the bike to Dr. Suda, and they made her run like
a top. smooth steady power all the way. |
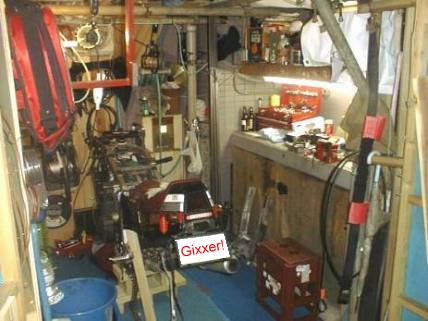
This is the spot that I have made to work on the Gixxer, it is a bit
tight, but I can lock everything up and walk away.
The poor old Gixxer is on a wooden stand as the front and rear wheels
are off as I go through another series of repairs. I am rebuilding the
front forks, and the rear end as well. |
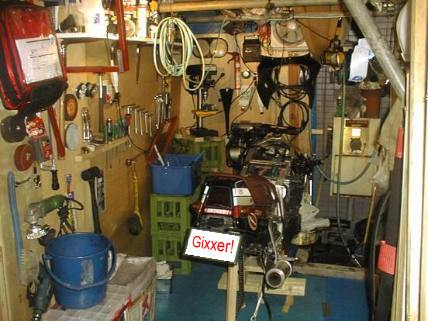
I'm getting a fair collection of tools, and am in the middle of some
major repairs, I have totally rebuilt the swing arm, as all of the
bearings were toast, and will have a new shock here form Ohlins someday I
hope! |
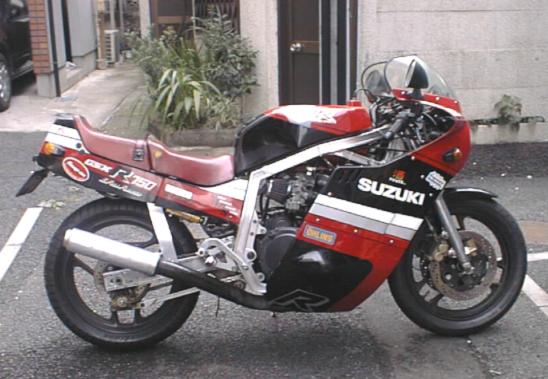
There the old nail is finally finished, at least until the cold months of
winter come again! |

Click thumbnail to see a full sized image
How is this for a T-shirt Idea? |
|
October Update! |
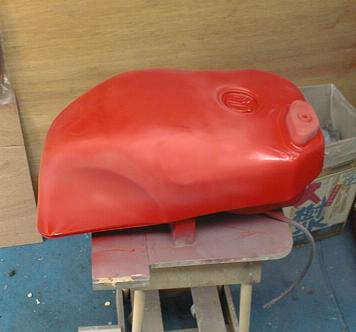
Well after getting a whole bunch of things done on the bike I finally
decided to take care of the big dent in the side of the tank. I used aerosol
paint, but the stuff for gas tanks. It has four steps, Primer, Undercoat,
Topcoat, and Clear coat. Here it is with the final undercoat on and sanded
with #600 Wet & Dry (WD) sand paper |
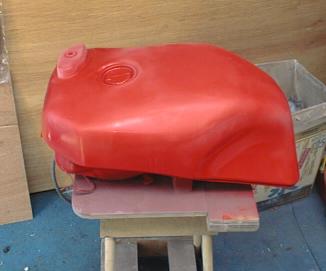
I had to remove the stickers from the tank and sand it all down, this was
the worst part of the job. I then used a two part epoxy type filler, this
comes in two sticks, cut off how much you think you'll use and mix them
together to, when they are evenly mixed, you put in in the dent. It is supposed
to be for gas tanks and will not fall off in a year like bondo does, we'll
see.
Here is is with the final topcoat on and sanded with #1000 WD paper. |
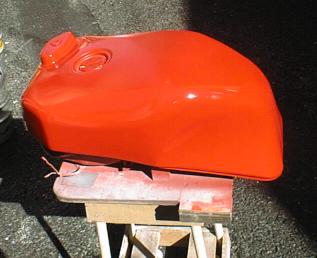
The four coats of clear coat on. Cool day, so after I sprayed it I put it
in the sun to warm up. |
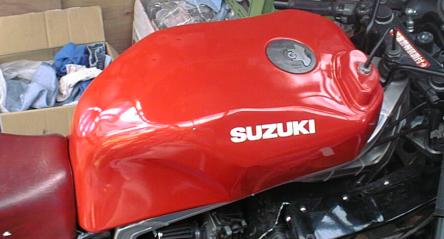
The finished product, 4 coats of primer (gray), 2 coats of base color, 2
coats of top color, and 4 coats of clear coat. I let it dry for 16 hours,
then I sanded it carefully with a #1500 WD sponge that I have, worked
really well, use lots of water and keep it clean. I then dried it off and
let is sit another day. The next step was the rubbing compound, this is a
lot of work, as I don't have a power buffer, just elbow grease. I think
that for a back alley spray bomb paint job it is OK, sure a lot better
than it was. |
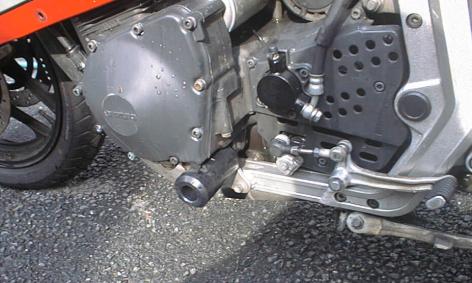
This old nail runs really hot, that "Oil Cooling", I find that
in traffic it gets so hot I boil the gas in the carbs causing it to run
extremely lean. One fix for this is a heat shield, I bought this from
Yoshimura and I had to cut my own pattern, as they did not have one for my
bike. A few hours work.
At the very bottom of the pic in the middle you can also see the frame
slider that I have installed, I don't know how they will work, and don't
want to find out. |
Here is a before and after pic. |
Here is a pic of the right side frame slider |
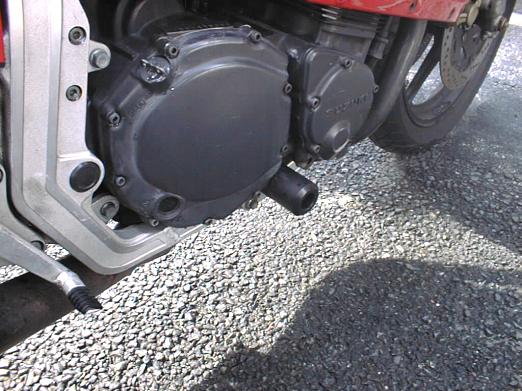
And another view.
Of course, just after I got these installed I found a set of engine guards
for this bike really cheap on Yahoo Auctions, I'm waiting for them now. I
don't know if they will work with the frame sliders or not. |
|
Update!!
I ended up not keeping the frame sliders, I got a stock set of engine
guards that mount on two places of the frame and cover the case with a
steel guard, much better, and they will fit under the fairing. |
|
Here is a list of things done to the bike, or at least things I can
remember doing :) |
|
listed below here, in
no particular order are a few things I've done to the old nail, the only
cosmetic thing I've done is repair and paint the tank, and that was only
after I got everything else sorted.
1) rebuilt the front brakes, all new seals, boots, polished the pistons,
new crush washers.
2) replaced shagged stock lines with steel braided lines (to improve the
feel, not the actual power)
3) rebuilt the front brake master cylinder
4) rebuilt the back brakes, all new seals, boots, polished the pistons,
new crush washers.
5) rebuilt the back brake master cylinder.
6) new front brake pads
7) new back brake pads
8) rebuilt the clutch, new steel plates, organic plates and springs, spent
2 hours filing groves out of the clutch basket
9) rebuilt the clutch master cylinder
10) rebuilt the clutch slave cylinder
11) replaced the clutch master cylinder
12) replaced the clutch slave cylinder
13) replaced the leaking seal behind the front sprocket
14) replaced the seal around the clutch push rod
15) cleaned the gas tank
16) replaced the fuel tap
17) replaced the fuel line and protective spring on the fuel line
18) replaced all of the bearings, bushings, and seals in the swing arm
(about 20 parts)
19) replaced the seals, spacer and bearings in the real wheel
20) replaced the seals, and bearings in the front wheel
21) had the rear tire and air nipple replaced
22) had the front tire and air nipple replaced
23) removed front fairing and fairing stays for repair
24) straightened and repainted fairing stays
25) replaced upper cowl with new/used piece
26) replaced and repaired the headlight assembly
27) lubed chain (once a year if it needs it or not)
28) replaced the header gaskets
29) replaced the missing left side body panel below the seat
30) rewired the gas tank sensor, wires were toast
31) replaced the shagged stock ignition wires
32) replaced the shagged stock ignition coils with Dyna coils
33) repaired the battery holder and painted it.
32) repaired the positive and negative wires to the battery
34) removed the chain guard, as it was warped and rubbed against the chain
35) removed the rear inner and outer fender as it was warped and rubbed
against the tire is two spots
36) removed the Grab Bar" and the 3 or 4 kilos of steel holding it on
the bike
37) cut the side and rear panels of the cowling to allow air in under the
seat to stop the rear shock from over heating
38) replaced the fork springs with progressive springs
39) replaced the fork wipers and seals with leak proof seals
40) changed the mixture of oil water and other unidentified stuff with
fork oil in the forks
41) rewired the horn as the clips were no good
42) Found out that there were some loose bolts on the engine and popped
the head gasket, washed the bike really well.
43) pulled the head, replaced the blown gasket
44) replaced the "O" rings and other seals in the head
45) cleaned the piston tops and the head with a wire brush
46) replaced the head
47) readjusted the valves
48) replaced the head cover gasket
49) mounted the Dyna coils under the tank instead of on the rails of the
frame near the gas tank
50) re-did the ignition wires
51) took out the shagged rear shock
52) waited a long time to get my new rear shock, an Ohlins
53) installed the Ohlins rear shock
55) set the rear sag
56) removed the air box
57) installed individual K&N filters
58) bike ran like shit, eventually got Dr. Suda to rebuild and rejet the
carbs
59) fitted breather hose from the head cover to out back near the license
plate
60) removed the old broken license plate holder
61) fabricated a new license plate holder
62) installed new license plate holder
63) found a set of free floater rotors that were 300 mm diameter on Yahoo
that might fit my bike
64) removed both rotors
65) found out that on the left rotor one of the 5 bolts was busted, and it
was held in place by the rotor being rotated slightly pinching the busted
bolt
66) drilled the old bolt and extracted it, I have lots of practice at this
now (Thanks Marc!)
67) to drill the old hole and get it ready for tapping and heli coiling I
built a jig to hold the wheel in my drill press
68) drilled hole to be heli coiled
69) heli coiled the hold
70) reinstalled the rotors with all new bolts (other free floating rotors
were just the wrong size)
71) Changed the oil and filter in the engine
72) went out and won a world super bike race in my spare time (just seeing
if anyone read this far)
73) installed two computer fans on the oil cooler to help in the hot in
traffic riding
74) computer fans worked well, bike much cooler to ride in traffic
75) had fun trying to figure out the strange buzzing noise on the front
end of the bike at about 100 Kmph
76) found out that the computer fans had cooked bearing from getting
pushed in the wind at over 100 Kmph, they made a strange buzzing noise
77) got the Yoshimura heat shield kit for the bike
76) no pattern for my bike, so I had to make on from scratch
77) installed the Yoshi heat shield
78) Changed to synthetic oil
79) drilled and safety wired the oil filler cap
80) drilled and safety wired the oil drain plug
81) installed the bar-end sliders on the bike
82) greatly modified the under fairings so they would fit over the Yosh
Cyclone full system
83) found the under fairing still cooked
84) moded the fairing more, installed heat shielding in lower fairing
85) modified frame sliders to fit on lower engine mount bolts
86) won an auction for stock Suzuki engine guards for the bike
87) removed the frame sliders
88) installed the stock engine guards
89) fixed a wiring glitch that made my tail/brake light intermittent
90) installed new/used windscreen
91) installed new headlight cover, old one cracked
92) replaced leaking timing cover gasket
93) replaced leaking "O" rings on oil pipe
94) while adjusting the valves found one head cover bolt hole was
stripped, drilled and heli coiled it
95) used wrong size heli coil (used 8 mm, should have been 7 mm, which is
a very weird size to be on a bike)
96) got a 8 mm bolt and fabricated a head cover bolt using the special top
of one 7 mm bolt
97) adjusted the chain, as it was a bit loose
98) oiled the chain, even though it had only been a few months
99) removed the rear foot pegs
100) fabricated an new exhaust hanger for the bike
101) did a wheelie down Meji Dori and had pipe separate at the collector,
went home and put the old passenger pegs back on to get a hanger that
worked :(
102) well at this point there was not too much to do on the old nail, so I
finally got sick of the much dented tank and fixed it
I think that if you
have the entire bike sorted and it runs like a scalded dawg, then fine, if
you have the time, the money and the inclination to add flashy bit go
ahead.
I'd rather spend the
money on tires, trackdays or gas for rides.
|